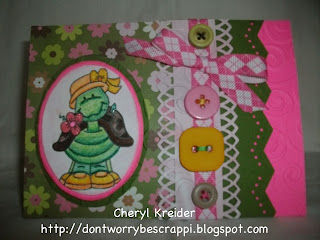
So now on to my latest cards and some tips for cuttlebug newbies like myself...
On the hop I picked up this great image of a little turtle from Bugaboo Stamps (freebie) I read somewhere the tell tale signs of a novice card maker is over-embellishing...so I added the buttons only after consulting with my daughter and her friend! lol.
On Friday I got my cuttle bug, somehow I felt disadvantaged to "not" have one and I was so envious of everyone's textured papers and perfectly cut circles. It was definitely a case of design tool peer pressure! For the couple of card makers out there that still do not own one I have a few things to share with you.
The first time you try and emboss (which means "squish" a design onto your paper) you will be a little scared that the plate is going to crack because you will hear some creaking and squeaking of the plastic pieces. At first I was scared I might crack my B plate but I checked the internet and found out it is normal. I also had purchased one of the spellbinders nestabilities (other scrappers call them "nesties" ...basically they are those shapes that are cut perfectly with a little professional edge and sometimes you see that they are layered two or more high.) I was scared to use my nestie circles at first because on the spellbinder package it said you needed a "tan mat" to make them work with the cuttlebug. I later found out that you "can" use them anyways sandwiching them between the B and C plates but that your embossing may be "crisper" WITH the mat. The circles pictured in these cards , however were NOT done with the cuttlebug -these were traced using a fiskers template (pictured behind the cuttlebug) for the cost of about $3.20. The fisker template is WAY more economical than the cuttlebug system but
This is a card I made using two of the cuttlebug embossing folders. The yellow was a circles design and the blue on top was swiss dots. This image was a freebie from Bugaboo Stamps (freebie) designs...so cute! I colored it in with a combo of colored pencils and sparkly gel pens in some areas. A lot of the card makers use copic markers but at this point I can't afford them at six dollars and change per marker so I opted for a box of 36 colored pencils at 6.99 instead! This was my daughters favorite card of the three I made this weekend.
This last card I made utilized Velda's sketch #6 from the OWH challenge


No comments:
Post a Comment